Choose Your Own Adventure

About Z (10) DZ Adventure (30) Food Adventure (7) Golden Birthday Gift (4) Moving (1) My Babies (1) RoadTrip1 (3) RoadTrip2 (5) Rocky (1) Z Out and About (3)
Showing posts with label Food Adventure. Show all posts

Monday, January 13, 2014

Scavenger's Smoothie


Our bushes after a decent snowfall but before the "polar vortex" snow and cold blew in.
          Happy New Year!!  Welcome to 2014, a year that is full of promise to bring big and new adventures! I have entered my last semester of school, and hopefully this time I mean it.  By the end of May I should have my chemistry degree and be happily job hunting for a career that will have to force me to retire because I'll love my job so much.  That is the dream, after all.


Post "polar vortex."
          D and I split our break between our parents' houses: one week at his, one week at mine.  It was wonderful getting to spend time with family and friends playing games.  We've successfully broken in Settlers of Catan, Castle Panic, and Cards Against Humanity.  There weren't many days spent just relaxing and doing nothing.  Our best adventure of the break was heading to Silver Springs on a beautifully snowy day before the "polar vortex" snow and cold crashed in.


          My two favorite parts of Silver Springs are the spring and the lakes.  The spring stays green all year since the water coming from the ground is warm enough to sustain it.  The contrast of fresh greens and snow always pulls me in.  The lakes are also amazing throughout the seasons.  During warm seasons they can be an amazing turquoise and during long cold spells they can freeze over.  I discovered this for the first time years ago when I came out here for a walk with a friend.  We went after we'd had a really long cold spell and were amazed at all the ice fishermen and their ice huts.  It looked like the ice was at least eight inches thick on that day but we thought the fishermen were still nuts for going out to the center of these deep lakes.

Leaves gathered into the groove in the snow.
          This year D convinced me to get out on that ice.  We followed the footprints of a fisherman out to a hole in the ice to see that it was only about three to four inches deep this day which made us a little nervous.  But there were no creaking or groaning sounds like in the movies, and there were four or more men out on the ice and I trust that they know when it is safe to be out so much further than we went.  I still heard my Dad's disapproving voice in the back of my mind.

Out on Beaver Lake's icy cover.
          After playing on the ice and snow it was time to head home and warm up while playing some Minecraft before the snow storm really kicked into full blast.  I was tempted to head to a large, uncleared parking lot to do some donut practicing, but the call of warmth and home was too loud for us to ignore.

Even the Fox River has a nice thick cover on it.
          I just finished my first day back to class and I can tell that it will be a very interesting semester.  I am taking instrumental analysis which should provide a good interesting challenge as I learn more about analytical chemistry and how to use various new instruments.  I love playing with new "toys."  I should get to learn how to do mass spectrometry instead of just interpreting the results, and I am very eager to get to use a scanning electron microscope.  Then I will be furthering my knowledge of inorganic chemistry while looking further into using literature sources... I wonder how many journal articles I will read in my lifetime?  Definitely more than I am interested in.  And finally I'll be exploring biochemistry with a professor who promises to be a hoot and a half.  I have a feeling this wise owl is definitely going to give us our money's worth in challenges.  Today she used our own explanation of what a living thing is to nearly prove that a pen is alive.  How do you define what a living thing is?  When is something alive?  Is a virus alive?  Is a prion (whatever that is) alive?  I already have the textbook open and will be reading chapter one tonight.  I have a feeling I will be making lots of vocabulary flashcards this semester.

These Minecraft zombies are comforting each other as they ponder whether or not they are alive.

          Aside from classes and labs I'll be continuing my research.  I wrote a semester summary of what I did in the fall and that helped me really see what I've accomplished and what I still want to do to get more meaningful results.  Tomorrow after lab I will learn how to use the new laser and play with some more nanoparticles.  I love exciting those little buggers!

          There are two main downfalls to being back at school, though.  One is pretty obvious, D and I are separated once again in opposite directions as we begin this semester.  It was very nice getting to see him for a full two weeks over break.  Two is that I have yet to go grocery shopping and my fridge is nearly empty.  That is a bad place to be when you're craving something sweet and somewhat healthy (after all that yummy, heavy holiday food).  With a look around my pantry and freezer I was able to whip up a little something I call...

Scavenger's Smoothie


          It's a bit like a scavenger hunt.  You look through what you have and once you find things that ...might work together, well, just blend and drink up!  I had some leftover frozen smoothie blend (assorted frozen fruit essentially), half a can of mandarin oranges and their juice, and I threw in the leftover heavy whipping cream to make it more like a smoothie rather than just cold juice.  It blended very well and is quite tasty.  So there you go, craving a smoothie and don't have milk or yogurt or any other thickener?  Just wing it and maybe you'll luck out.


          I hope you had a wonderful holiday season and were able to stay warm if you're in the northern hemisphere and cool if you're in the southern half.  I don't think I've noticed readers in South America, but I hope you all survived that extreme heat you had while we were attacked by a "polar vortex" up here.  Good luck to all students, and to everyone else, try something new to make your day a little more special.

Wednesday, January 30, 2013

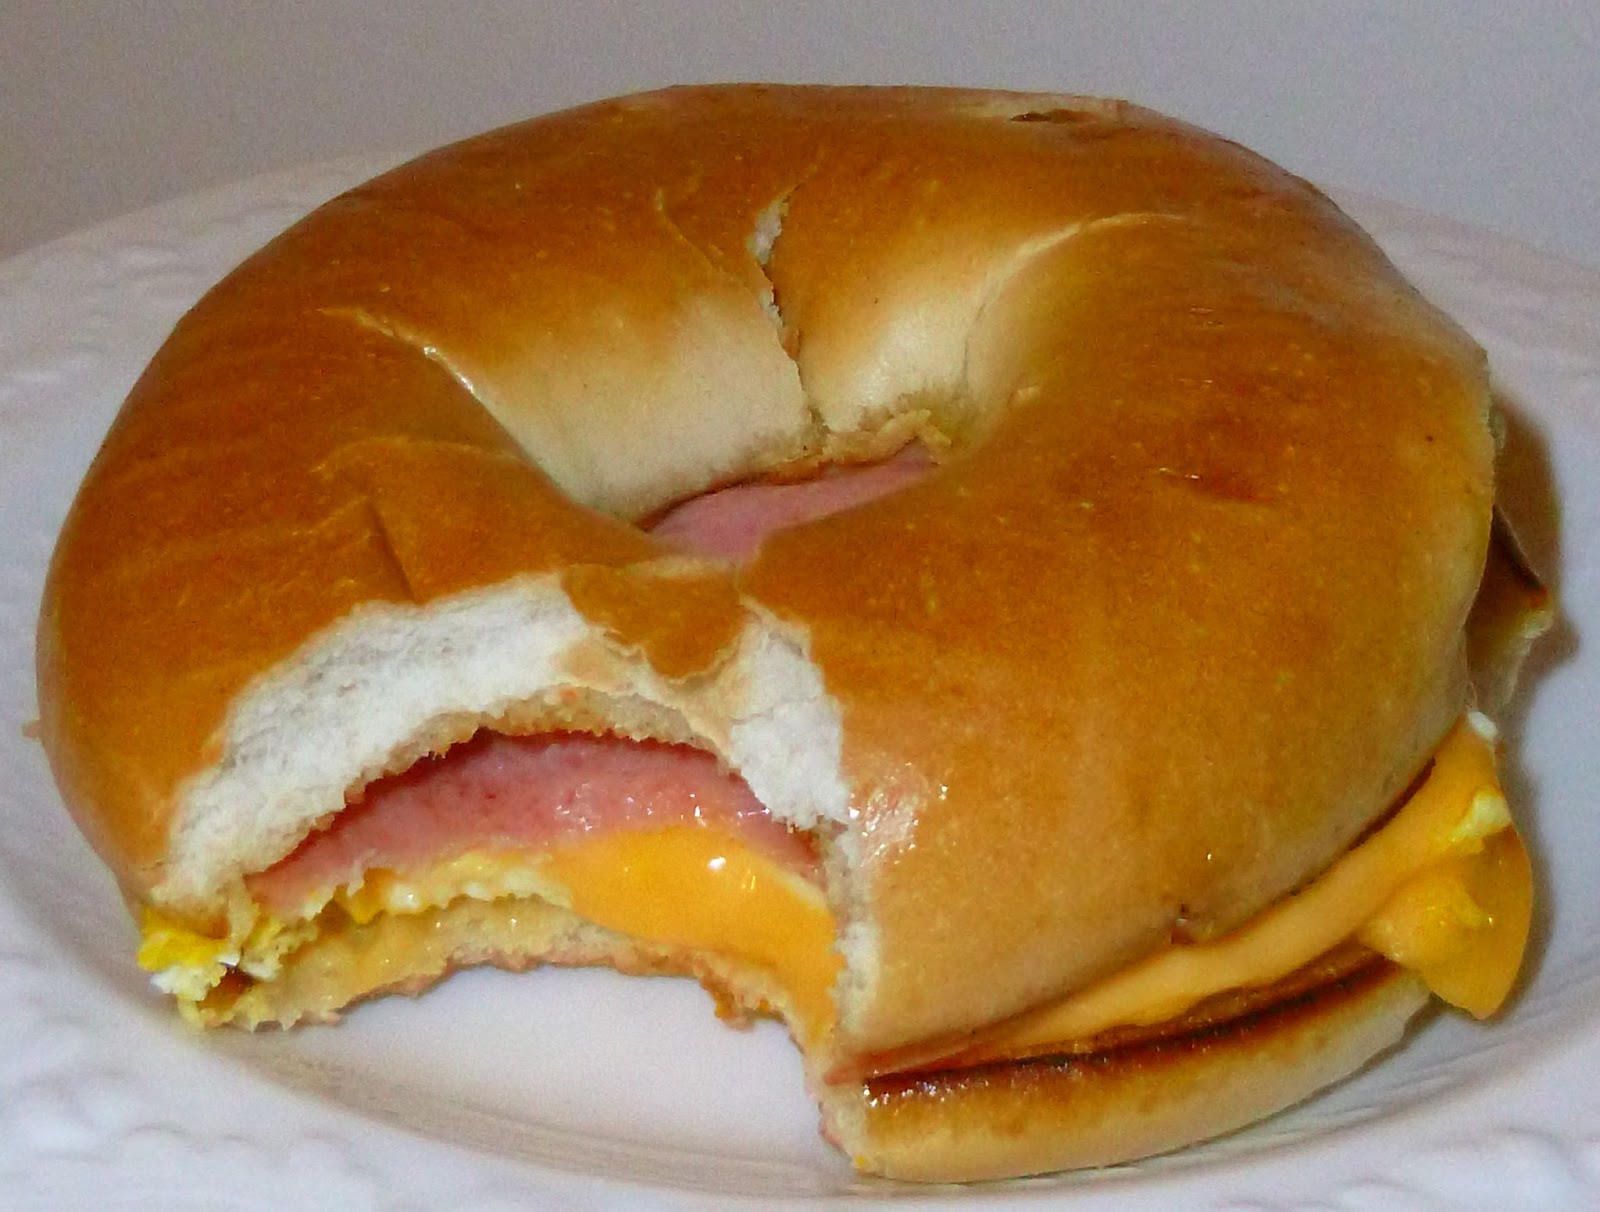
D's Breakfast Bagel

          During one of D's visits he introduced me to an amazing treat: the breakfast bagel.  I know I mentioned it before, but it is so good that this masterpiece is worth its own post.


          The first thing you need to do is get the bagels out of the freezer and open one up with a knife. Be careful not to break it since it's frozen still.  What?  You don't keep bagels in the freezer?  You must eat bagels really fast.


          Next, get out that lovely artery clogging butter and add a thin coating to both halves while freezing your hands on the cold bagels.  You don't need a generous layer, although go ahead and do your own thing. I love butter but I think a thinner layer will help with the frying.


          Third, place your bagel halves on a hot frying pan and enjoy that sizzling butter sound. Yes, you must enjoy it or they won't turn out right!  Trust me, you don't want to mess with this.


          Your goal is to get both halves evenly slightly brown.  I think I needed to press mine down against the pan to get the even browning.  Make sure to throw some meat in the pan as well and enjoy that sizzling sound, too.  I added two slices of honey ham, two is not nearly enough. What was I thinking?


          Now add a generous helping of butter to the hot pan and notice the difference in sizzling sounds between this, the bagels, and the meat.  Don't let it burn!  I'd recommend not trying to take pictures of it while it is on the hot pan. Instead, move that pan around to get the butter to move all over it to be ready for the egg (s).


          Here comes more breakfast for this bagel!  Fry at least one egg on there.  Now if you're really, really hungry you can try frying more than one, but remember, no matter how hungry you are the size of your stomach doesn't change.  So if you have a small stomach like me, that stinks.  Stick with one egg.  But if you're luckier, add another or more so you'll have a bigger bagel.


          After you let that egg cook a little, go ahead and break the yolk and push it around.  So it's not quite a scrambled egg because it has larger chunks of whites and yolks.  Of course, that's also your preference you should listen to.  Look, I made egg art!


          Now if you're like me, make sure you don't forget this next step: add salt and pepper.  I always forget about that.  Once the egg is cooked go ahead and push it towards the center, keeping the heat up, into one bagel sized blob.  The higher heat will cook your egg faster and make this next step easier.


          Put a slice of cheese on top of the pile, and if the heat is high enough it should start melting right away. I wouldn't recommend using a high heat while taking pictures, though, unless you have an assistant or the eggs might get brown and I hate brown eggs.


          If you aren't photographing while cooking your cheese should be a lot meltier than mine is right now.  Next is the fun part.


          In a fantastical display of your amazing frying pan dexterity, slide that mass of egg and cheese right off the pan onto the bottom bagel half.


          Add the meat and the top half of the bagel and you are ready for my favorite step.


 ENJOY!

Thursday, November 15, 2012

Chocoholics: This One is for You!

          My poor D.  First I make super creamy and cheesy mac and cheese and rave about it to him while he's still working in the lab.  Now I send him a message saying I just made mouth heaven.  I hope he'll be able to get food soon.
    
          I had every intention of telling you a story about me as my next post, but after making heaven, I'm afraid it's a food blog instead.  Today I made:


          I don't normally give you recipes and all if it's a recipe I got from Pinterest, like this one is.  But today I'll make the exception because this is so good I want you to make it now!  Ok, probably not many of you have frozen sliced bananas in your freezer like I do, so you can't make it now, but get chopping.  

Ingredients:
1 and a half medium sliced and frozen bananas
3 T (that means tablespoon) unsweetened cocoa powder
2 T cream (I used whole whipping cream, yum, any extra will become whipped cream)
1/2 tsp (that means teaspoon) vanilla extract

          The recipe says it makes two servings, no, I'm eating both right now.  This makes about one big scoop of ice cream.  And I mean Z big, so probably 2 scoops for the average ice cream eater.  Well I grabbed my ingredients, washed my blender, took my pictures and was ready to go.  This comes from a website that says Magic One-Ingredient Ice Cream, but that's a major lie, isn't it?  If I only used one ingredient it would either be already made ice cream, or frozen bananas.  I bet frozen and blended bananas doesn't taste too bad, but how can they claim one ingredient when you need more?  Maybe they just mean if you have frozen bananas there are many ways you can make them into ice cream.


          I forgot the next step.  A very important step: read the directions.  I saw the word: blend, and that's what I did.  I mixed and I blended and *poof* the cocoa powder filled the blender.  What you should do to prevent that mess, although it was funny and cool to see, is blend just the bananas first, then add everything else and blend until creamy.  If you are patient, you can now freeze your ice cream, but if you are like me, after you lick the spoon off you will be licking out as much as possible from the blender and then devouring the rest of the chocolate ice cream within your reach!  Yes, I put my tongue in harm's way and even licked out the area around the blade.  I have an old blender that comes apart into several pieces.  That means the blade has also been dulled from years of use, so don't worry, my tongue is fine.  With this result I have to give a Grade: A++, ok, two pluses might seem extreme, but I can see myself forgoing buying store chocolate ice cream and just making a quart of this myself instead.  No joke, this surpasses some store bought chocolate ice creams.  And since bananas are so cheap I bet I could make a quart of this ice cream for a couple bucks or less.

          I was afraid that 3 T of cocoa powder would be too much, it really looked like a lot, but don't worry, this is still very sweet and super chocolatey!  The sweetness from the bananas keeps the ice cream from being too dark, although I like 60-80% dark chocolate.  Above 80% starts getting too dark for me.  I think the German blood in me allows me to appreciate dark chocolate perhaps a bit more than some other people do.  


          Last night as I relaxed watching Transformers: Revenge of the Fallen and catching up on episodes of Bones my sweet tooth kicked in.  Once again I turned to Pinterest for a quick snack idea involving bananas. The link on the pin takes you someplace that doesn't seem to be at all related to bananas but the idea was written on the pin so the link on the title above will take you to the pin and not the website.  You cut up a banana, pour on the honey, and sprinkle on cinnamon.  They show a lot of cinnamon in their photo but I used less and was perfectly pleased so I imagine the amount of cinnamon used it up to you.  I used a lot of honey, though, so I could really dip those slices and drown them in honey.  

          I was very, very pleased with the results.  What a quick, easy, and super tasty way of satisfying a sweet tooth as well as getting potassium into your diet.  I obviously am at no risk of running out of potassium from the number of bananas I've been eating, but for anyone looking for a way to make bananas palatable  this is a great way to try!  When I was younger I loved the crisper bananas with green still on them and the yellow ones, or *shudder* bananas with spots were just vile to me.  So if you are like that or have kids you are trying to get to eat a banana, this is a healthy and easy way that just might work.  I can't make any promises of course, kids are fickle.  I give this snack a Grade: A and this will be a go-to snack when I have yellow or spotted bananas sitting around waiting for me to eat or freeze them.

This picture was taken after the mac and cheese had been sitting for nearly an hour, so if it looks a little dry, that's why.
          Fear not, I won't let you leave without letting you know how to make the mac and cheese I raved to D about.  Remember, the titles are the links to recipes I get online.  If I post an "original" recipe, meaning one I didn't get from the internet (although it may already be out there) I will post the recipe here for you.  

          The name isn't lying!  This is super creamy and cheesy mac and cheese.  It calls for half of a can of evaporated milk and 1-2 cups of shredded cheese.  Well, I love cheese, so I used more.  First you cook the noodles by themselves, and I learned that 5 minutes of boiling 12 oz of noodles wasn't quite long enough.  I'm used to cooking the individual servings of Easy Mac in the microwave for 3 minutes so I thought 5 minutes was pushing it, guess not.  They were still cooked, but the noodles were slightly tougher than I would prefer.  Aside from that little hitch, everything else was really easy.  I shredded what was left of the 8 oz. block of sharp cheddar and got a little over 2 cups of cheese.  Remember to keep the burner on when adding the shredded cheese to help it melt.  I got all of the 2+ cups of cheese to melt into the pot and added the entire can of evaporated milk to keep things from getting too dry.  

          I love this recipe!  I did not add salt or pepper since I figured the cheese would have plenty of salt already in it.  I would say that this super cheesy, amazingly creamy mac and cheese could use something extra for flavor, though.  I love it just as it is but if anyone knows a spice or herb that would make this even more amazing I would love to hear it!  I think chopped up ham would add that extra flavor, but I imagine a dash of some spice could do that, too.  Again, another Grade: A recipe.  This makes a nice big pot of mac and cheese and for a college student living on her own it will last me about 5 meals since I eat way too much of it in one sitting.  I would like to experiment with different cheeses to see how that changes the flavor.  This recipe is certainly a make again, though.

*Edit-I just added salsa to it and it is magical! Wow, I will definitely make this again. Hopefully next time D is over so I don't eat the whole pot myself in a week.

          The blogger says the seasoning is the key to this recipe and obviously I missed that.  She has seasoned salt and my spice rack does not have that.  Some people also look at this as a healthier version of mac and cheese because it doesn't use the cheese powder packet, no.  This is not healthy.  So if you are looking for healthy this recipe is not it, but if you want creamy and cheesy you came to the right spot.  4 T of butter does not count as healthy in my book.  My sister is a fan of butter in recipes.  She accidentally doubled the amount of butter in peanut butter cookies for me last weekend, but I ate those cookies faster than I've ever eaten cookies before, so it was a winning idea.  

          There you have three more winning ideas and some pitfalls you can avoid when trying them.  Happy cooking!  I'll tell you about the excitement in the biology lab when I get a chance to sit down long enough this weekend.  Have a great Friday!

Wednesday, November 7, 2012

Pre-Hibernation Baking with Z and D

          Is winter here?  It sure got cold very quickly!  I keep expecting to see snowflakes falling from the sky.  Every morning is a fight to get my feet out of my warm bed and across the cold floor to get dressed for the day.  I've started putting clothes on a chair beside my bed so I can get dressed without touching the cold tile.  I even have a rug over the tile and it doesn't seem to make any difference!  I've never lived in a place with tile flooring before.  My parents have that fake almost plastic floor that looks sort of like real wood, and I thought that stuff gets cold, but that's nothing compared to tile.
     
          Then once I do get myself out of bed I'm bundling up with a sweater, my winter coat, and gloves heading to class.  Thankfully I've only had to scrape frost off of my windows once so far.  I told my mom a few weeks ago that it wasn't turtleneck season until the leaves fall off the trees and I have to scrape my car, well, I've worn turtlenecks the past three days.

          What I wear isn't the only thing that's changed with the weather.  I suddenly find myself uninterested in fruits and veggies.  At the start of the school year that was all I wanted to eat.  Now I want cheese, baked goods, and lots of meat.  I went grocery shopping today and loaded up on all my staple processed freezer foods: taquitos, chimichangas, orange chicken, chicken nuggets, and over the weekend D and I bought s'mores and snickers ice cream.  I feel like a squirrel trying to instinctively fatten up before the truly cold temperatures arrive.

          I had no intention of changing my eating habits. I was proud of myself for eating so well for so long.  But now I drool looking at all the baked goods on Pinterest and I have plans to start making them.  I should have seen this dietary switch coming, should have noticed the signs.  Two Saturday's ago I made myself a mug chocolate chip cookie.  That was my first warning sign.

by Melissa at No. 2 Pencil (link in title)

              Ingredients: 1 T melted butter                1 T sugar                1T packed brown sugar
                                   3 drops vanilla extract         pinch of salt            1 egg yolk
                                   scant 1/4 c. flour                 2 heaping T semi-sweet chocolate chips

              Instructions:  Combine butter, sugars, vanilla, and salt in your mug.  Add yolk and combine.  Stir in your flour, then chocolate chips.  Microwave for 40-60 seconds checking at 40 but not going beyond 60.  The mug will be hot and the cookie will continue to cook even after it is removed from the microwave so heating beyond 60 seconds will dry out your cookie as it continues to cook.  This is delicious while warm and adding a little ice cream doesn't hurt.  Just make sure you don't burn your mouth by being impatient.  This was just cooked in a mug that holds heat in very well.

          These delicious little mug cookies are perfect for when you want a cookie and not a couple dozen or don't want to wait for the oven to preheat.  The proof of how good these are is that I can never get a picture before I've already dug into it.  Mmmm. Perfection.  Grade: A+ of course!


          Next thing I know I'm craving one of Hardee's new burgers.  Have you tried them?  You know, the ones with the thick beef patty full of actual flavor, then at least two other types of meat piled on with cheese and little onion rings.  Oh those are good.  D and I picked ourselves up two of those (with a BOGO coupon) after he arrived and we pigged out on the 970 calorie burgers, don't ask how much fat.  That was pretty much all we'd eaten that day so we had to catch up on calories, right?

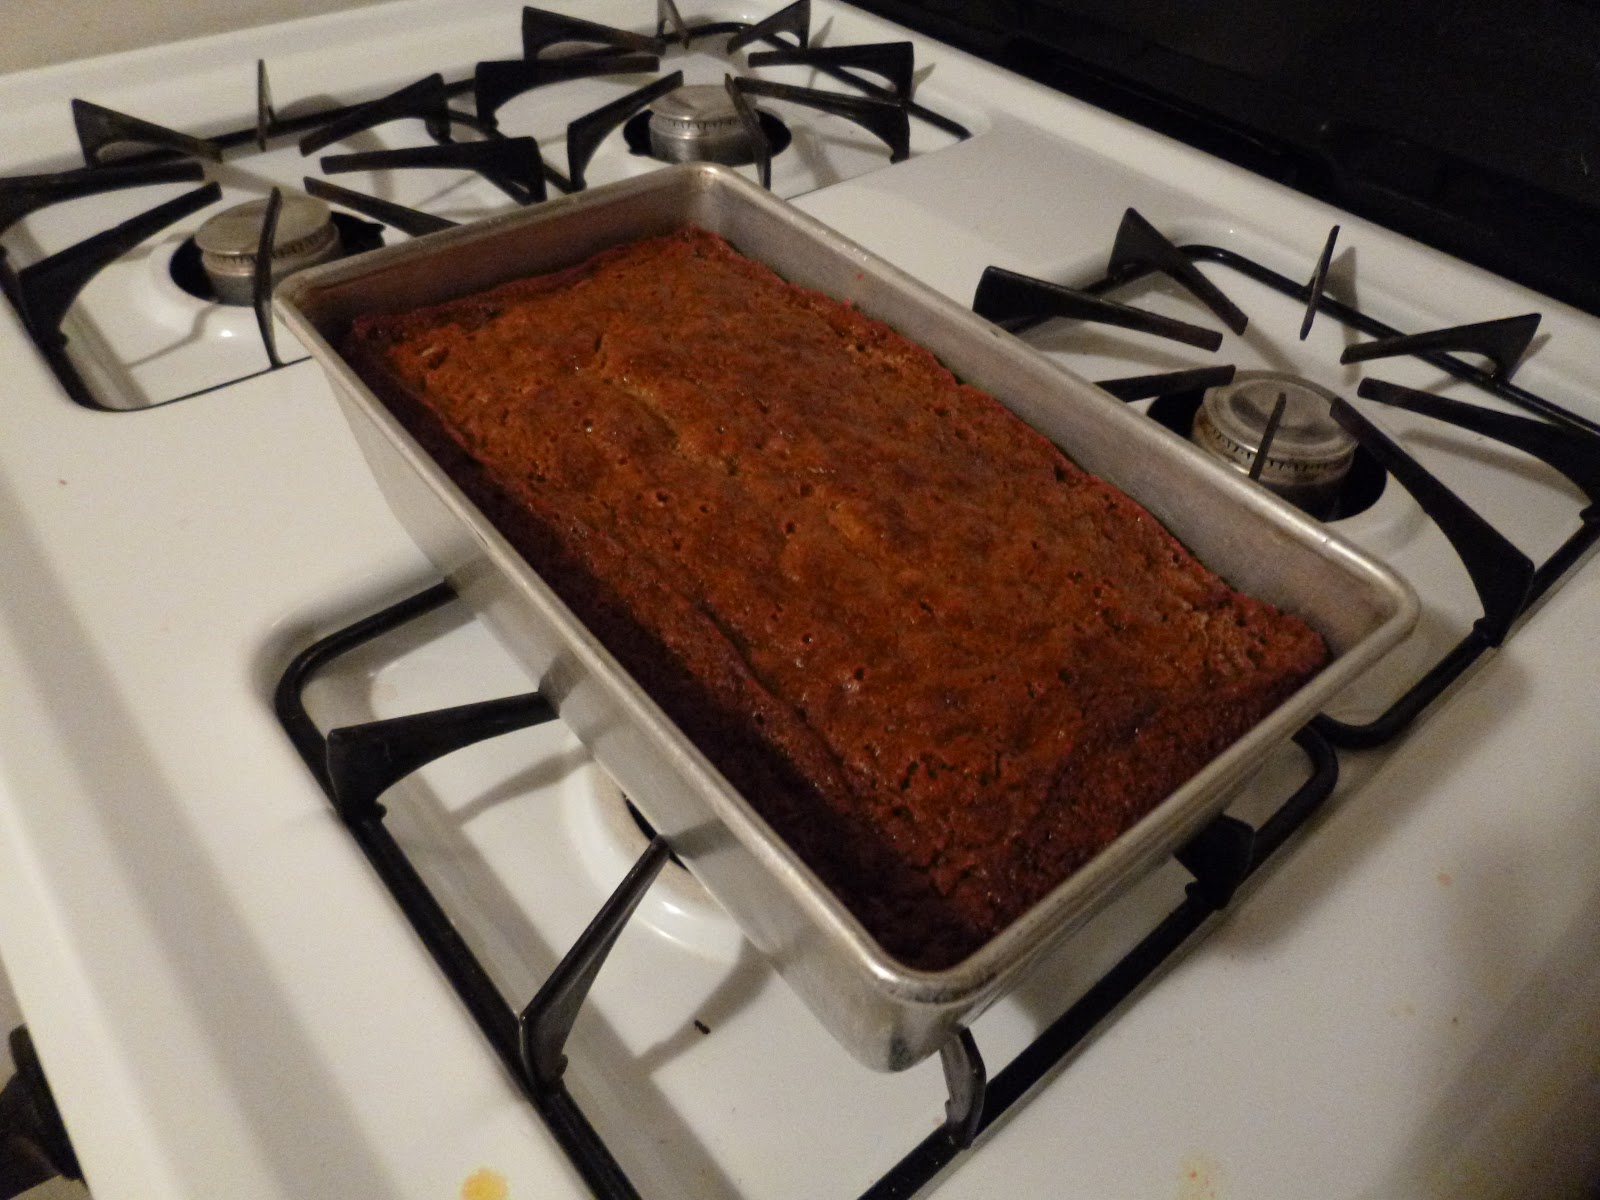
         I feel like a zombie.  Instead of brains though, I'm moaning, "baked goooods" and that leads me to my next food adventure.  Bananas are really cheap right now so I've been buying two entire bunches each week.    The three I let brown from last week finally browned enough and on Sunday I got the bread in the oven and put D in charge of watching the clock.


          I repinned this recipe after a good friend of mine pinned it with a positive review.  That good friend has given me much more than a good banana bread recipe, though, and I promise to tell that story sometime, although probably not soon.  I have made two loaves of banana bread already this semester and the other two were made with whole wheat flour.  I followed this recipe exactly (except that I cut it in half), and I am very glad that I did.  Whole wheat flour is great for health reasons, but the flavor and texture take some getting used to.  This banana bread is almost like a cake with how sweet it is.  I was working on homework so D was sweet enough to butter a slice for each of us and by the time I finished my homework and my one slice he'd already eaten a second.  I suppose I don't need to ask him if he liked it!  He even took some back with him to his school.  


          We just made this on Sunday and already there are only a few slices left.  I don't think I've ever eaten banana bread so quickly!  This one definitely gets a Grade: A+ from me and it makes me want to try out my other two banana bread recipes with white flour to get an accurate comparison.


8/31/2012 My first loaf of banana bread ever!
          I found this recipe from Kirsten B's 366 Days of Pinterest blog.  She tried it with success and I was looking for healthy food to get me off to a good start of the semester.  Kirsten said the honey flavor was a bit overpowering and I must agree with that.  I love honey, but there is such thing as too much.  However, I would make this recipe again because it is healthy, it is easy, and when eaten in moderation it is very tasty.  I give this recipe a Grade: B+.

9/28/2012
          I also got this recipe from Kirsten's blog and loved the idea of a banana bread that already had peanut butter inside it so I wouldn't have to slather it on each slice.  I discovered again that there can be too much of a good thing.  Because I used only whole wheat flour the texture was denser and drier than my most recent banana bread, but by the time I finished the loaf it had certainly grown on me and I can say it was good.  I drank a lot of milk that week with this bread.  Grade: B+ again.  So now I would like to try each of those recipes again using white flour instead.  I wonder what difference it will make.

          Want to know something slightly humorous?  When I was a kid I would eat banana bread but only because my mom put it on a plate in front of me.  Since I've been old enough to pick my own meals I usually skipped out on her banana bread.  Now I'm making it on a regular basis and quite enjoying it.  I guess I shouldn't have given up on it.  Mom makes lots of great baked goods.  Not only can she cook but she can bake like no other.  I love her pear bread.  I think I'll have to grab that recipe soon and give it a try now that I've mastered banana breads.  She also used to make a delicious cranberry bread around Christmas for me. That was my favorite.  I will have to pick up that recipe, too.

Breakfast Bagels

          Sadly, I do not have a picture to show you, but my amazing D made me dinner while I was doing homework.  He also did some dishes, and I believe he would have done them all if the scabs on his hands had allowed it.  Yep, I told you he is awesome!  

          I was not able to watch, but D tells me that the trick to making amazing breakfast bagels is putting butter on the bagel then cooking it on a frying pan until it gets nice and toasted and slightly browned.  Then you scramble some eggs with salt, pepper, and a little milk to make them fluffier.  Add egg to the bagel and place a slice of American cheese on top and it all melts together into mouth-watering perfection!  I am not a huge fan of eggs, but I ate one and a half of these bad boys which added up to more than 2 eggs, and I wish my stomach was big enough to have eaten more.  I will get D to make these for me again and I will watch and learn and get a picture to show you.  You really want to try these!  He says he usually adds some meat to them, but I was all out of meat.  No ham, no bacon, so sausage, not even sliced turkey.  I'll correct that for next time so I can have the full experience.  

          The last experience I want to share with you today is a chocolate and peanut butter banana shake idea that I had before but did differently today.  I know, this is already quite long.  This is what happens when I get very busy but have lots to tell you.  I don't want you missing out on anything!  I'm most anxious to start telling you about my grandest adventure but I want to make sure I have plenty of time to tell the story right.  So for now you get food stories because the gray sky hasn't inspired many outdoor adventures.


Blend 1 medium banana, 1 T peanut butter, 1 c. choc. milk and  1 c. ice.
          The first time I made this I used white milk with chocolate milk powder.  I thought that it was rather tasty and gave it a Grade: B+ because I was sure the flavor could be improved by using real chocolate milk. Today I followed the recipe exactly and I was disappointed.  The chocolate milk by itself is better.  I think the problem might be that the blender I have at my apartment is not nearly as good as my mom's blender so I had ice chunks floating around.  The peanut butter flavor also seemed to mask the chocolate which was quite disappointing.  I think I might still be recovering from the peanut butter overload from the peanut butter banana bread.  So today I give it a Grade: C but I think that reducing the ice and peanut butter quantities could greatly improve the flavor.  I am not giving up on this one, yet, it is really simple to make and I think it has a lot of potential to be delicious and still healthy.

          There you have it.  My recent food adventures along with some past ones.  I sincerely thank you for sticking around and reading.  If you are reading my blog for the first time, welcome, please check out my others and you'll start getting a feel for what I'm up to.  If you are a repeat reader, I am very grateful and thankful and pleased that you are interested enough to stick around.  I would love to hear from you so feel free to leave a comment just saying hi, or maybe you like one of my ideas or have a story of your own to share.  I love stories, telling them and hearing them and I'm really curious to know who my readers are.  So if right now you're too shy to say hi, that's ok. Hi =) to you.  I hope you are doing well.  Perhaps down the road as we go on more adventures together you'll want to share some of your own.  Until then, stay warm if you're in the northern hemisphere and enjoy your spring if you're in the southern half of the planet.  If you're in the middle, I suppose you're just always hot.  =D

Thursday, October 25, 2012

Slaying My First Butternut Squash

          Yes, another food blog.  Is that three in a row?  Look at me getting all busy in the kitchen!  I set a goal for myself to try making one new food item each week while I'm at school.  Since I'm living on my own and I don't have any witnesses to my massive failures (haven't had any yet), I feel confident enough to search the internet and try making foods I've never even heard of before.  I like making sweets and main dishes.  Side dishes I concoct without recipes for the most part.

Cottage cheese, Super Orange Emergen-C packet, mandarin oranges. Yum!
Just keep mixing until it stops fizzing so much.
          This week I really want a main dish because the past two weeks I've been living off of leftovers and microwavable foods.  I finally went grocery shopping after I turned my lab report in Tuesday evening, and my body was very happy to have fresh fruits and vegetables again!  I bought two whole bunches of bananas so that I can let a few bananas brown for bread, eat a few fresh, and freeze the rest.  Frozen bananas are great for smoothies and shakes.  The Chunky Monkey Shake is one great use for bananas that also temporarily satisfies the chocoholic in me.

Mixed veggies and chipotle ranch dip with my cottage cheese concoction.
          As my lab report was printing I hopped onto Pinterest and checked my food board.  I looked around a bit dismissing recipes that called for lots of ingredients I don't have, or lots of complicated steps or equipment I don't have.  I really wanted soup because that's my favorite fall dish.  I finally found a recipe for a butternut squash soup.  My only experience with butternut squash was a dish my mom made over a year ago and I loved it.  I don't even remember what it was anymore, but the happy part of my brain lit up so I checked the recipe and decided this is something I can do.  My next step was researching how to pick a good butternut squash.  I took notes, wrote down the ingredients on my shopping list (my sister-in-law got me a magnetic to-do/grocery list pad that is really useful), grabbed my lab report and  headed out.

Got this idea from Pinterest, sadly no directions, just a pretty picture.
I had an old egg to use up and a fresh bell pepper to play with.
          I headed to Aldi as my first store since they usually have better prices on everything.  I got about half the items on my grocery list there, skipping a few that I am willing to pay more for a specific brand.  Then I headed across the street to that big box store we all love to hate.  You know what?  That big box store had butternut squash twice the size of mine for a third the price as Aldi!  I wanted to go back across the street and return my little squash in favor of one of these big, cheap ones, but I didn't.  Does anyone know of a website that you can type in a grocery item you need and it will tell you the cheapest place to get it within a certain radius?  That would be really useful.

          Today was a pretty easy-going day and I was hungry after class for something real and something not frozen.  By real I mean a meal that's actually prepared, not just a frozen item or a few odd items eaten separately and called a meal.  Yesterday after I got home I finished my egg that was past its date and since it tasted so good, something with egg in it sounded good for today.  So I grabbed an egg, my potato that is growing eyes or sprouts, dark orange bell pepper, that leftover mozzarella cheese from this weekend, butter, and spring mix salad.


          I melted the butter on a frying pan, added the bell pepper, baked the potato and added that in chunks then cracked my egg onto it all.  I remembered to add the pepper while it was all cooking but I threw the salt on afterwards.  I melted the cheese into everything until I had a lovely mass of egg and potato.  I scooped all of that into the bowl that had salad already waiting in it, then added a few more leaves on top with the hopes that this bag of salad will disappear into my stomach before it gets a chance to mold like last week's spinach.


          This was surprisingly yummy!  I called my mom while eating and inquired about how one cuts up a butternut squash.  See, I may be living on my own, but I still need my mama.  She has so much practical knowledge from years of working in the kitchen, raising kids, owning a home and yard that when I have a question about life, I know I can turn to her for the answer.  And even if she doesn't know the answer she can usually point me in the right direction or we can just chat for a while.

          After I said goodbye, I got to work stabbing that squash!  It felt like carving a pumpkin, but this time I was eating it instead of displaying it.  Butternut squash smells a lot like pumpkin, too!  So I cut it open, scooped out the guts, and got to work skinning it.  Two things to be grateful for: longish fingernails and my kitchen guardian angel.  It's amazing anyone lets me hold a knife!  Remember that confidence I mentioned earlier?  Let's be honest, I have false bravado and determination when it comes to cooking, and lots of luck. I don't have confidence or skill, yet.  I am clumsy with knives and incompetent with a lot of other equipment. If you want something blended, though, I'm your girl.


          I chopped up the squash into non-uniform pieces.  How do people get uniform pieces from round foods?  Then I chopped up the leftover onion from egg drop soup that D and I made a few weekends ago.  I got that recipe from high school foods class.  It's much better than what most restaurants call egg drop soup. The onion got thrown into the baking pan with the squash and I started my oven at 450 F.  I added the salt, pepper, and oil and mixed everything together before spreading it out.  While that started roasting I prepared the chicken by cutting up two breasts and adding salt, pepper, and oil.  After 15 minutes of roasting I added the meat and let it roast about 25 minutes longer for a total of 40 minutes, then the squash was softened enough.


          The roasted meat and veggies (is squash a veggie?) got thrown into a large pot (whew, I wasn't sure I had one large enough) and the broth and spices got added.  Wow, coriander and cumin smell good.  My spice rack is really growing.  I started that simmering with my scary gas stove.  I grew up with electric so using gas just makes me nervous.  It's a really old appliance so it's hard to adjust the temperature.  I have a habit of accidentally turning it off when I'm just trying to turn it down.  With a stroke of genius I brought out the blender and blended several large chunks of squash and some bits of onion instead of just squishing the squash (haha, that's fun to say) against the side of the pan.  I probably should have blended more squash since the chunks aren't really tasty to me, but it worked at thickening the soup.  Simmer some more and eat!


          I am happy I made this recipe because it is much better than frozen food or leftovers and I just love soup.  So I have to call this a success!  As orange as it is it must be packed with vitamins, too.  The spices definitely make the soup taste complete.  There is something sweet about it and I think it might be the squash.  The squash has a texture like potato.  If I could find a faster way to cut up the squash without potentially losing body parts then this recipe would go on my "make again" list.  I give it a Grade: B based on first impressions.  It is nowhere near the "choking it down" flavor range but it might take a few bowls before I start dreaming about it.  As I continue eating it, though, it is growing on me more and more. So perhaps by the time I post this I'll be in love with this soup.  Hey, it could happen!  I'm excited to find more recipes that call for coriander or cumin.  I know my mom uses them because this soup is reminding me of her home cooking.  I mentioned she's a great decorator, did I also mention she is an amazing cook?  That's why I've never felt the need to really practice cooking.  Anything she makes would be better than anything I can make.


          The biggest downside to this soup is that it serves 6-8.  Convert that to Z sized serving and we're talking a dozen or more!  Well, the author says it freezes wonderfully so perhaps I'll split it between smaller containers and freeze them to pull out when I really want soup.  We'll see how much of it I can finish this weekend, first.

*** Edit 11-1-12
          I am now on my last bowl of this soup and I can definitely say I like it.  I blended up the rest of the onion and squash bits and added a little extra water to the individual bowls if I felt they were too dry.  I added more salt and pepper until it reached my liking.  Today I added leftover mozzarella cheese and that was the trick!  Cheese, to me, completes a meal, so I am now happy and will be sure to have shredded cheese on hand next time I make this.  There will be a next time.

          As you can tell, I love trying new foods.  If you have an idea of a recipe I should try please leave me the recipe or a link in the comments and there's a very good chance I'll give it a try.  The link for this recipe is the title, if you didn't notice.  I think I'll start doing that for recipes that aren't my own.  Have a fantastic Friday!

Tuesday, October 23, 2012

A Spooky DZ Halloween Party Food Adventure

          I love that my man is willing to help me make treats for parties!  He is such a big help and has some clever ideas, too.  The thanks goes to his mom and sister for drafting his help each Christmas when it came time to make thousands of treats.  He gained lots of experience and knowledge.  So I guess he won't complain when I ask him to help me make a few dozen easy treats.  He will troll me a little, though, and I love that, too.  What's working in the kitchen without trolling?  Boring, that's what it is!

          Saturday was our friends' Halloween party.  Last year I threw a small Halloween themed lunch for a few friends and I had a lot of fun making the spooky treats.  Spaghetti brains with garlic bread, make your own caramel apple with caramel in the slow cooker to stay melted, bread stick bones, a floating frozen hand in the apple cider, and Halloween cupcakes were all a lot of fun to make.  My mom and sister helped me prepare a lot of that food, and I was very grateful for their help.  This year I volunteered to bring a few things to help take some of the workload off of the hostess.

Zombie Ribs with Zombie Dipping Juice

          I accidentally hit a zombie with my car on my way home Friday night, and I figured, why waste perfectly good spoiled meat?  So I hauled the monster into the back of my little car and took him home.  I know zombie ribs are a popular entree at my house and a great quick food idea.  Why  not share it with my friends?

          This is sort of a cheater recipe because it is so easy.  You need a whopping 3 ingredients, a cookie pan, and Pam or some other cooking spray.  Preheat oven to 425 degrees Fahrenheit. 

*pizza dough in one of those exploding rolls
*pizza sauce, at least 8 ounces per dough roll so it's extra juicy
*mozzarella cheese, at least 1 cup per roll so it's good and cheesy

          I made a doubled recipe so I bought two rolls, 24 oz of sauce, and 4 cups of cheese.  

Step 1: Spray the cookie sheet with cooking spray to prevent the dough from sticking.
Step 2: Flatten out the rectangle of dough, spread the pizza sauce over half of the dough lengthwise add cheese to the same area and fold the other half of the dough over.
Step 3: Press the seams together so that all the goodness stays inside.  You can poke holes in the top of the dough but I did one with holes and one without and didn't notice a difference.
Step 4: Bake in oven for about 20 minutes at 425 degrees Fahrenheit.

          Time to make my pizza bread into ribs.  Most intact zombies have 24 ribs so I cut each pizza dough side into 12 ribs and put the extra sauce into a bowl as dipping juice.  These were rather popular at the party, and for as fast as they are to make this recipe is definitely a make again.  Grade: A  I left the leftovers at home so my sister could finish it since the actual recipe is named after her on Mom's recipe card.  I took the leftover mozzarella home with me, though. I can always find places to add extra cheese.

          The only problem I ran into when making these ribs was subduing the zombie.  Apparently getting hit by a car doesn't kill them right away like it does in some movies.  This sucker put up quite the fight and both D and I ended up a bit mauled.  I think we averted disaster, though, our skin isn't turning colors.  Boy I sure could use a snack though, something gray and intelligent perhaps?

Salty Halloween Treats


          I found this recipe on Pinterest from Free Cake Info and again you only need 3 ingredients: smaller sized pretzels, Hershey's hugs, and candy corn.  I also used a cookie sheet and parchment paper.  I let D do most of the work on these while I worked on the witch's hats.  We laid out the square pretzels on the parchment paper on the cookie sheet until the pan bottom was nearly full then we started unwrapping the chocolates to place on each pretzel.  The oven was preheated to 350 degrees F.  My silly D decided to start placing wrapped hugs on the pretzels and he chided me for messing up his pattern when I unwrapped them.  So I replaced them with wrapped chocolates and fixed his pattern.  Next thing he decided to start making his own pattern and I patiently waited and worked on the witch's hats as he wrote me a little love note in chocolates. =D Yes, he is the sweetest which is perfect since Saturday was Sweetest Day.

          D then finished his task of unwrapping the chocolates and he placed them in the oven for 3 minutes.  When he brought them out to let them cool and start placing the assorted candy corn on them, they melted and oozed all over.  Apparently 3 minutes was longer than they needed.  We waited a long time and they still would not solidify much but D managed to get a piece of candy into each hug and he placed them in the fridge to cool and harden.  

          Here is where his experience comes in handy.  When it was time to pack them up for the party he was smart enough to use cut up pieces from the used parchment paper to separate layers of candies so they didn't all stick together.  I would have just tossed them all into the container and ended up with a lot of candies stuck together.  We left the candy pumpkin attempts out of the container since we ran out of room and they oozed the most, and they were ready to go.  I ate one pumpkin and my parents ate the other two when they discovered them left on the counter.  That one little pumpkin was quite yummy, but I really want... mmmm.... brains?

          These were a big hit at the party and I made sure my friends took some home with them, and D took some home when he left my house that night.  He deserves the credit for how well they turned out and in fact he deserves a lot of credit for all the help he gave me Saturday!  Don't worry, I made sure my friends knew. Who can resist bragging about how helpful their man is?  I can't.  I give these candies a Grade: B+ Next time they don't need to stay in the oven for 3 whole minutes and that will make them an A+ for sure.  Delicious!

Halloween Witch Hat Cookies


          Isn't simple wonderful?  These cookies are another Pinterest idea from Explore. Dream. Discover.  Once again you only need 3 ingredients: Hershey's kisses, orange tube icing, and Keebler fudge stripe cookies.  I got the double fudge cookies so they were black through and through.  How do you make these super difficult and absolutely adorable little edible hats?  Put a ring of icing around the base of a kiss, press it into the center of the upside down cookie, then add another ring of icing around the base of the kiss to look like a ribbon.  I wanted to add bows but the tip of the icing tube wasn't narrow enough for it to look right.  I placed the cookies on parchment paper while I waited for them to dry then, for added effect, I placed them around a witch's hat on a round pizza pan for support.  This really made the treats feel like Halloween.  D was amazing again and wrapped the whole thing in cling wrap so we could transport them without losing any cookies.  Grade: A+, super easy to make, no mess with the parchment paper, and very fast.

Slimy Worms!

          I must admit that I saved the best for last.  This one also isn't simple.  If you want to make simple worms for a party then buy gummy worms, put them in chocolate pudding and add blended Oreos to look like dirt and mud.  That is simple.  If you want slimy, gross, realistic and fantastic worms, then do this.
Instructables: Bowl of Worms


          You will need:
*2 3oz packages of raspberry jello (or any red jello)
*1 3oz package of unflavored gelatin (I just bought a 6 oz and a 3 oz package of raspberry)
*3/4 cup whipping cream (I chose heavy)
*3 cups boiling water
*15 drops green food coloring
*100 flexible straws (pull them flexed, can use more if you want)
*tall container (or a 1 gallon ziplock bag and a bread pan with potholders to fill in the extra space)

          Combine gelatin in a larger bowl than I have pictured, and add boiling water.  Stir.  Let cool to lukewarm then add whipping cream and food coloring and stir again.  I didn't let mine cool far enough and when I added the cream it curdled a bit, but somehow the finished product wasn't affected by that.  I then placed my straws without a rubber band into a 1 gallon ziplock bag and added the jello right into them.  I let out as much air as possible and tried to make sure the jello fully covered all of the straws.  I then laid them sideways in a bread pan and shoved about 3 or 4 potholders into the side to keep the ziplock bag in a shape that kept the straws covered.  I then put this into the fridge overnight and hoped for the best!

          The next day I was pleased to see that the curdling didn't seem to stick around and the jello was very firm.  I took the entire brick of jello and straws out of the bag and put them on a plastic cutting board.  Now comes the messy part.  This is a REALLY messy task.  The jello is sticky and slippery all at once and if you don't like those kinds of textures then you won't like this part of the process.  My job was cleaning off the straws of all the excess jello.  There was about as much excess jello as there were jello worms.  But I wouldn't use more straws unless I could find a way to get the jello to stay in those straws during the setting process.


          It's a good thing D and I were early-stage zombies for the party so it didn't matter that our hands were stained red.  D was amazing and took on the task of squeezing 100 worms out of their straws and placing them into the bowl for the party.  He put one finger on the end of the straw and slid his other thumb up the straw, squeezing the worm out.  That worked quite well but it took a long time and was very sticky.  Using a rolling pin was a suggested idea for making this go faster or holding the straws over warm water.  So try it out and find what works best for you.


          Sadly I do not know how well these would have been received because they got left in the fridge during the party.  But they looked gross and tasted amazing.  I enjoyed slurping down a few worms when D and I got back that night and I brought the rest back home with me.  They are starting to flatten and stick together so don't make this too far in advance if you want individual worms for your presentation.  I give them a Grade: B because they are fun and taste great but they are messy and time consuming.  So I would only make them again if I can come up with an easier way to get the worms out of the straws and to clean the straws.  Also, my worms have the full opaque stripe following the length of the worm because that's the way the cream floated and settled in the straws lying sideways.  If you want your cream to be at one of the ends you'll have to stand the straws vertically; the cream floats.

          All in all Saturday was a very fun day!  I got to see some great friends, eat amazing food, and spend the day with my sweetie.  I hope you all had a great weekend and have a fantastic week!

Thursday, October 18, 2012

Z Food Adventure- Peanut Butter Cookies and Cream Frozen Yogurt

          Along with good old going places and seeing things adventures, I also enjoy adventures that happen close to home or in the kitchen.  I'm living on my own for the first time this fall and that means that I can either eat prepared meals bought in stores or I can make my own.  For the most part I love eating lots of fruits and veggies throughout the day.  They put me in a better mood and I feel like I have more energy when they are the majority of what I eat.  Now, I eat my veggies with very liberal amounts of dip, so that adds some unhealthiness to the healthy factor, but I'm not worried about that.

          Today's adventure starts online.  I decided to give Pinterest a try and I joined late this summer.  I heard how useful it was for putting a bunch of links in one organized place for me to use whenever I need.  So I got on and started pinning housework tips and food ideas.  Then of course I started pinning all the random glorious fun things out there, too, and haven't stopped.  But what use is Pinterest if all we do is pin things?  Aren't these links here so we can actually use them?  That started me on my food adventures.  I started placing specific recipes that I wanted to try on Z Food Experiments.  I've had a lot of success with those recipes.  If you're on Pinterest and haven't tried anything you've pinned I urge you to pick something and try it this week.  You'll feel like all those hours spent surfing and pinning are no longer a waste of time.

          All the fun I've had in the past couple months in the kitchen got me thinking: if people are posting their kitchen ideas on Pinterest I would like to share my successes and failures, too!  That's right, I am not afraid to share a failed idea.  It might save someone else time by preventing them from making my same mistakes.  So today I share with you a failed idea and tips on how to potentially improve on it.

Peanut Butter/Cookies and Cream Frozen Yogurt

My camera does not take very good indoor pictures, yet. I'm still working on that.
          I saw recipes on Pinterest for making your own ice cream using bananas or various yogurts so I thought I'd give it a try.  My fridge is sadly very empty right now.  I am out of all fresh fruits and veggies, and the rainy weather has prevented me from wanting to go out and buy groceries.  So I've been getting creative with what I do have.  Yesterday I added canned mandarin oranges and an orange flavored Emergen-C packet to plain yogurt.  That was very yummy and the Emergen-C made the yogurt fizz a little so it had a slight tickling of the nose effect.  Since I am lacking fruits and veggies in my diet right now I figured adding vitamins in an alternate way was a good idea.  I would bet kids would enjoy taking vitamins that way, too.  That idea gets an B+ on my grading scale below; I'd like to try adding a bit of cottage cheese or make cottage cheese the main part of it next time.

          I still have lots of plain yogurt left and the expiration date is nearing so I figured today I would see what adding peanut butter can do to yogurt.  I added a forkful and tasted it and was quite pleased.  So I added more yogurt and more peanut butter and decided, why not, let's add three Oreos and see what happens.  Well good news/bad news.  Good news: the peanut butter flavor certainly comes through!  Bad news: too much peanut butter!  I realize now why in peanut butter ice creams they don't put much in.  It does not take much peanut butter to get plenty of flavor.  So don't add two or three very large forkfuls to your cup of yogurt, that's too much.  I can't really taste the Oreos, either and that's sad.  I tried it right after I made it and after freezing it and either way the peanut butter is just too much.  It becomes very creamy yogurt, though!

One cookie broken and mixed in, 2 cookies still whole and moistening.
          So it is not a total loss and if I added more yogurt I could probably fix it, but I think a cup of yogurt is enough to eat in one day.  Vanilla yogurt might be better, too, to add more sweetness.  If you're wondering, leaving it in the freezer about an hour was not quite long enough to completely solidify it.  So if you want to try this you  might expect to wait 2 or more hours to get a good frozen yogurt.  I think I'm going to try mixing strawberry jelly in the yogurt and freezing that next time.  I'd also like to try a peanut butter and jelly frozen yogurt.  If I do, I'll let you know how it goes!

          If I'm going to start making foods it might be helpful to have a way to judge the results.  Below is my initial grading scale that I'll use to rate my food adventures.  Today's recipe receives a C+ meaning it has potential to be much better, it isn't bad, but the idea of eating the entire dish doesn't excite me.  I love peanut butter and like yogurt so I will try this again with modification, and when I do I'll come back and edit this blog with a footnote to let you know how it went.  I'll also try to be more precise in my measurements so you can try it if you want.

Food Adventure Grading Scale: 
A- Excellent! Definitely plan on making it again.
B-Tasty success, might need slight adjustment to reach perfection but is good the way it is.  Make again.
C- Has potential for greatness but after X amount of bites eating becomes a chore.  Will try again with modifications.
D- Can't finish it without immediate modification, won't try again.
F- Not worth trying to fix and won't eat another bite.